voltage_regulator.html
Railroading with 
The Märklin Diary of a 44 yr old Kid
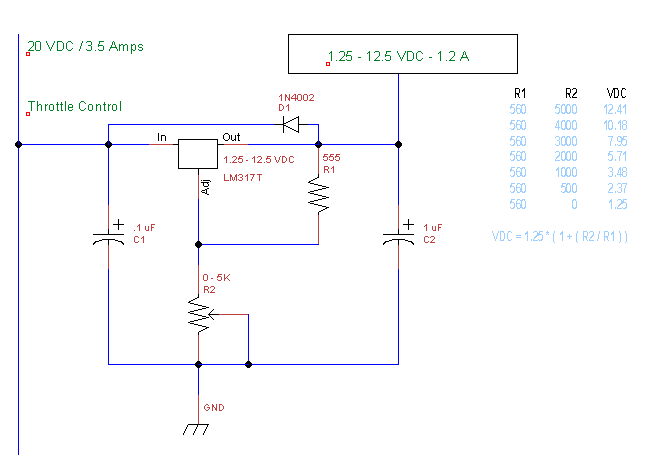
Voltage Regulator Circuit
Home - Märklin
Brewed
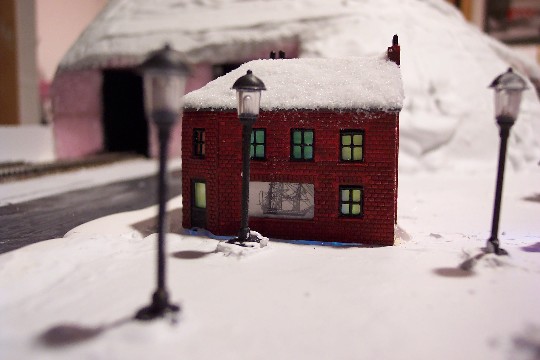
Last year, I built a small Christmas Layout in N scale using a Mini Trix starter set.
The power supply was nothing more than an On/Off switch attached to a 9 volt battery.
I wanted something a little more versatile that could power the house lights and a Faller Car System stop Magnet.
I have quite a number of old laptop power bricks that put out anything between 18 and 24 VDC, rated between 3 and 4.5 Amps.
They are quite small and would eliminate the tedium of changing batteries.
I chose one with an output of 20 VDC and a power rating of 3.5 Amps.
However, I had three different power requirements;
1) an adjustable amount of voltage for the lok; 0-12 VDC
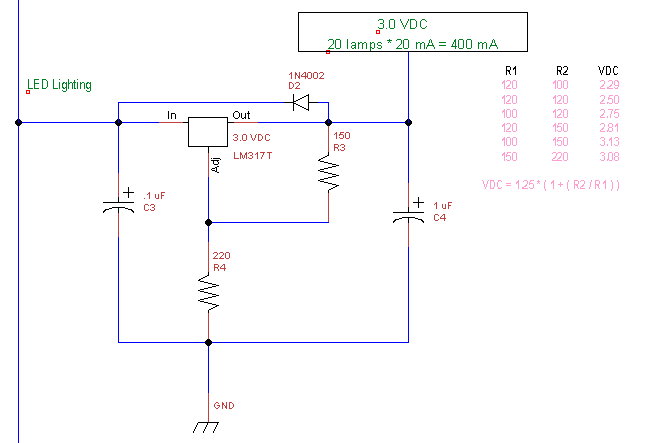
2) 3 VDC for the housing LEDs
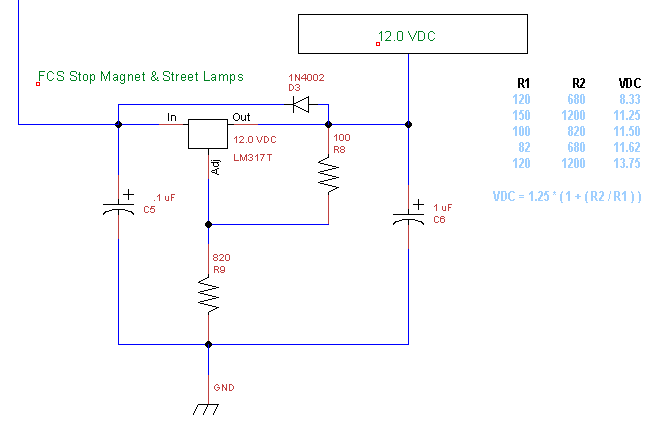
3) 12 VDC for street lamps, Faller Car System stop magnet and 2 lighted Christmas trees.
I do know which end of the soldering iron to hold without burning myself so I figured I would try and build something.
Of course, I knew nothing about electronics, but that never stopped me before!
So off to the internet I went, looking for some circuits.
Oh boy! I quickly learned how little I knew.
After a lot of reading and self-'edumecating', I came up with a basic design.
What was needed was a 'Voltage Regulator', to drop the voltage down from 20 VDC.
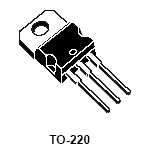
I found the LM317T at a local Radio Shack, but the information they had was a little sparse.
 |
 |
| LM317 Adjustable Voltage Regulator |
I began hunting through Digi-Key and found all sorts of goodies.
The data sheets for the parts have all the information you need.
If you have Adobe Reader, you can download and read these PDFs;
Click here for the Voltage Regulator.
Or here.
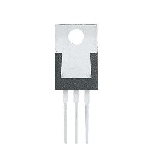
Click here for the Rectifier Diode, 1N4002.
Or here.
The diode provides some basic short circuit protection.
|
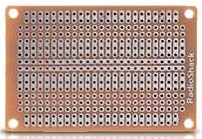
| Multipurpose PC Board |
There are three circuits, as outlined above.
Each require 2 resistors, 2 capacitors 1 diode and an LM317 voltage regulator.
A little planning is needed to fit the parts.
I found it best to install the lowest lying parts and work my way up.
Each voltage regulator has a heat sink, courtesy of some deceased computer component.
The schematics below were all drawn with TinyCad, by Matt Pyne.
There are actually three seperate images.


From left to right, the switches are for House LEDs, Street lamps and Xmas trees, The Faller Car System Stop magnet and directional switch for the train tracks.
A simple radio volume control was used to vary the power to the tracks.
The phono plug below and the phono socket above are to supply the 20 VDC from the laptop power brick.
You should cut power to the brick before plugging in the phono plug, it does short out for a moment when inserting.
It is wonderful to reuse parts from junk stereos.

The straw was used to protect the LED while applying sceniking material.
An interesting discovery was made.
If one uses a piece of thick, opaque straw, a wonderful spotlight is created, funneling light upwards.
An idea to be saved in the back of the mind.
Brewed
Home - Märklin